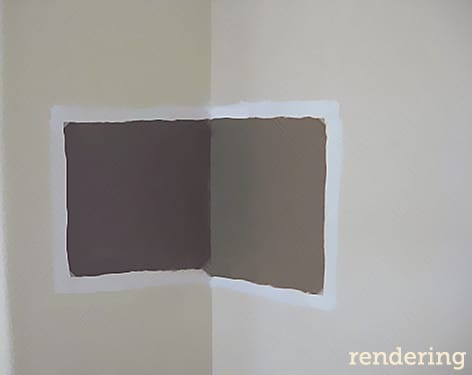
Many of you know I’ve long been anti-white border for testing paint colors. My opinion is supported by experience as well as science. It’s not like one day I just woke up and decided to disagree with one of the most oft served pieces of color advice.
I’ve thought about this – a lot. I’ve experimented – a lot. I’ve researched how and why white influences your paint color choices in all the wrong ways – a lot. I could qualify my opinion that a white border on paint color samples is a bad idea all day long. One much more brief example is this article about how to paint color samples that I wrote for my other website for Swatch Right™ paint-peel-and-stick color sample decals.
I’m very clear about my color point of view whether it’s writing posts on a decorating forum, my facebook page, or on one of my websites. So, when one of my regular readers came across the following recommendation, she could not wait to send it to me. “Lori, you are going to flip over this and I can’t wait to read what you have to say”.

The recommendation is that it’s necessary to purchase white paint in addition to potential paint colors and use it to paint a white border for color samples. See rendering above. Color me absolutely freaking gobsmacked. But wait. It gets better. Said recommendation takes place directly on the walls. I don’t care how careful you are, the outline of samples painted directly on the wall will telegraph through final coats of paint. It’s not about the colors telegraphing through as much as it is about the raised edges of the paint swatch leaving outlines where you splotched the paint.
Let’s be honest. Paint color sample pots are a ton of fun to purchase. Painting up samples is a ton of fun too. . . once, twice. . . by the third color it’s not so fun. The allure of playing with all those fun colors starts to wane as the tab for sample pots start totaling toward three digits and your kitchen is transformed into a paint color sample factory. I know you’ve BTDT. The realization that selecting paint color isn’t a game sinks in quickly when painting samples is part of your process.
All I can say is don’t do this. Don’t purchase white paint to make a border; let go of the idea that a white border is going to help you because it’s not. And whatever you do, don’t paint color samples directly on the wall. This is a perfect segue to name-drop my product, Swatch Right™ paint-peel-and-stick color sample decals, and I am plugging it because a Swatch Kit is the ideal solution. The decal mimics paint film and conforms to your wall’s texture. When you’re done previewing your color, just peel it off the wall. Swatch Right™ decals will save you from the tasks of priming over paint splotches and/or sanding to knock off their raised edges.
To wrap this up let me say this, I didn’t write this post so you’d buy a Swatch Right™. I wrote this post to help you understand HOW to swatch right.
AMEN! WTF?
Spare yourself the agony and FIRST pick a fabric or an area rug THEN put paint swatches next to them and skip the whole “test drive the wall” nightmare!
Another definite mistake is painting the potential colors right on top of each other, as shown above. That makes me crazy. I’ve gone for a re-visit and seen 4 – 5 tiny color swatches layered over each other in a row. I tell the customer, that’s worse than not testing the color at all. All your eye can do is compare the colors to each other, instead of trying to envision how the one new color might look everywhere.